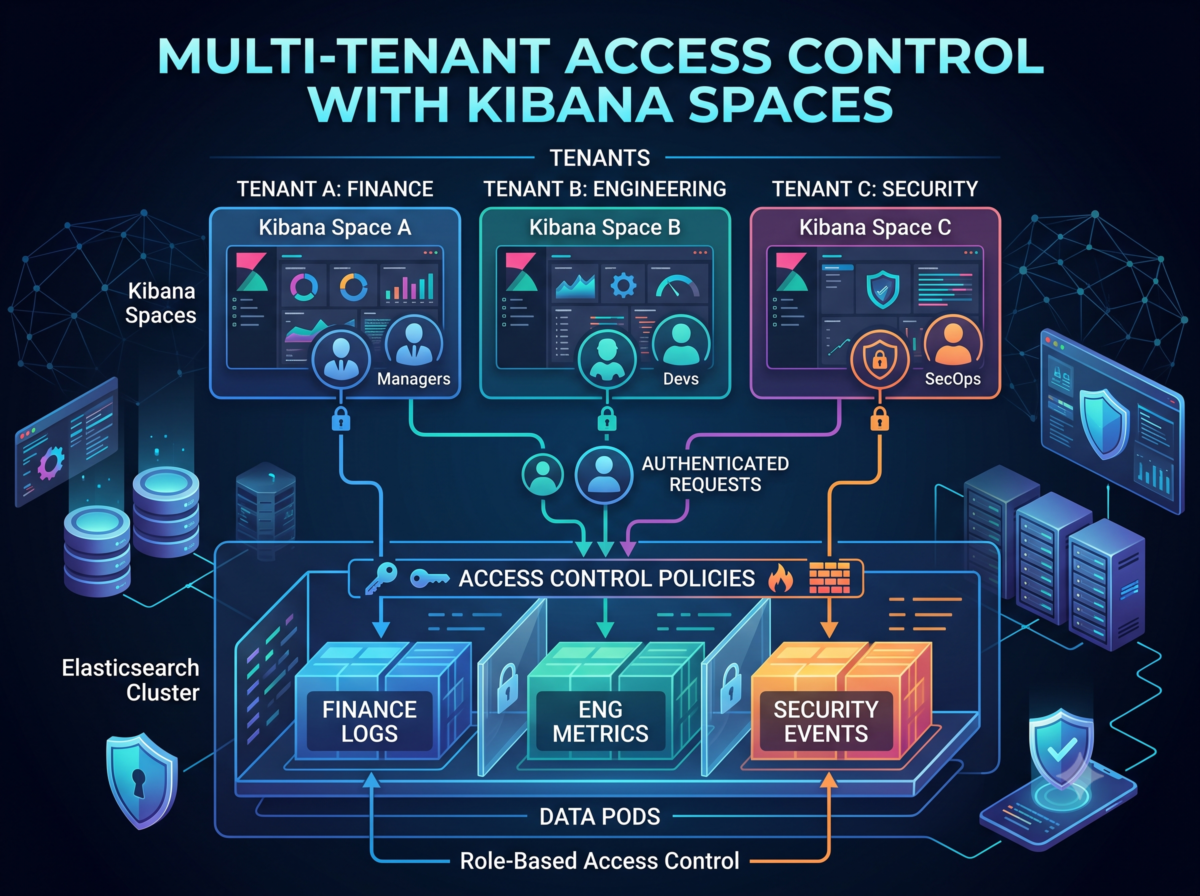
However, as organizations scale, managing a shared data platform across Finance, Marketing, and Operations can quickly become chaotic.
Moreover, without proper segmentation, teams sift through irrelevant dashboards.
Kibana helps by preventing accidental modifications and guarding access to sensitive data.
Fortunately, you don’t need to deploy separate infrastructure for every department. By leveraging Kibana Spaces alongside Elastic’s robust RBAC, you can create isolated, secure environments for each business vertical while keeping your underlying deployment unified.
What is a Kibana Space?
A Kibana Space is a virtual container within a single Kibana instance that lets you organize and partition your saved objects.
- Logical Isolation: Dashboards, visualizations, data views, and canvas workpads are kept completely separate. A dashboard built in the Finance space remains entirely invisible to users in the Marketing space.
- Shared Performance: All spaces share the same backend Elasticsearch cluster, meaning zero hardware overhead or duplicate maintenance.
- Tailored User Experiences: If the Marketing team only needs the Dashboard app and doesn’t use advanced developer tools, administrators can disable unused applications strictly within that space.
Blueprint: Implementing Multi-Vertical Access Control
To securely separate workspaces based on business verticals, align your Kibana Spaces (view layer) with Elasticsearch Roles (data layer). Additionally, here is the step-by-step implementation guide.

Step 1: Initialize Dedicated Spaces
First, set up clean virtual boundaries for each team.
- Navigate to Stack Management > Spaces in .
- Click Create a space.
- Name your space (e.g., Finance-Vertical or Marketing-Vertical).
- Under Customize features, toggle off any applications that the team does not require to declutter their sidebar.
Step 2: Restrict Data Privileges (Elasticsearch Layer)
Since all spaces pull from the same cluster, data-level boundaries prevent a user from seeing another team’s raw logs.
Moreover, these boundaries enforce data isolation.
- Go to Stack Management > Roles and click Create role.
- Name the role according to the department (e.g., finance_analyst_role).
- Under Index privileges, specify the exact index pattern for that vertical (e.g., logs-finance-* or metrics-finance-*).
- Grant the required data permissions—typically read and view_index_metadata.
Step 3: Link Spaces to Roles (Kibana Layer)
Now, tie the data restrictions back to the visual workspace. Additionally, this links the restrictions to the visual workspace.
- Within the same role configuration page, locate Kibana privileges.
- Click Add Kibana privilege.
- From the Spaces drop-down, select the dedicated space you created in Step 1 (e.g., Finance-Vertical).
- Set the access level. Granting All allows the team to build dashboards within their container, while Read limits them to viewing existing data.
Step 4: Provision User Access
Finally, additionally assign your users to their respective roles.
- Go to Stack Management > Users.
- Create or select a user account.
- Assign them their vertical’s custom role (e.g., finance_analyst_role).
The Result
The next time a Finance analyst logs in, they are dropped into an environment containing only finance-focused dashboards in Kibana. Additionally, they remain entirely unaware that a Marketing space exists. It creates a seamless, secure, and focused user experience.